Manual V-TAB Online
Welcome to the manual for V-TAB Online.
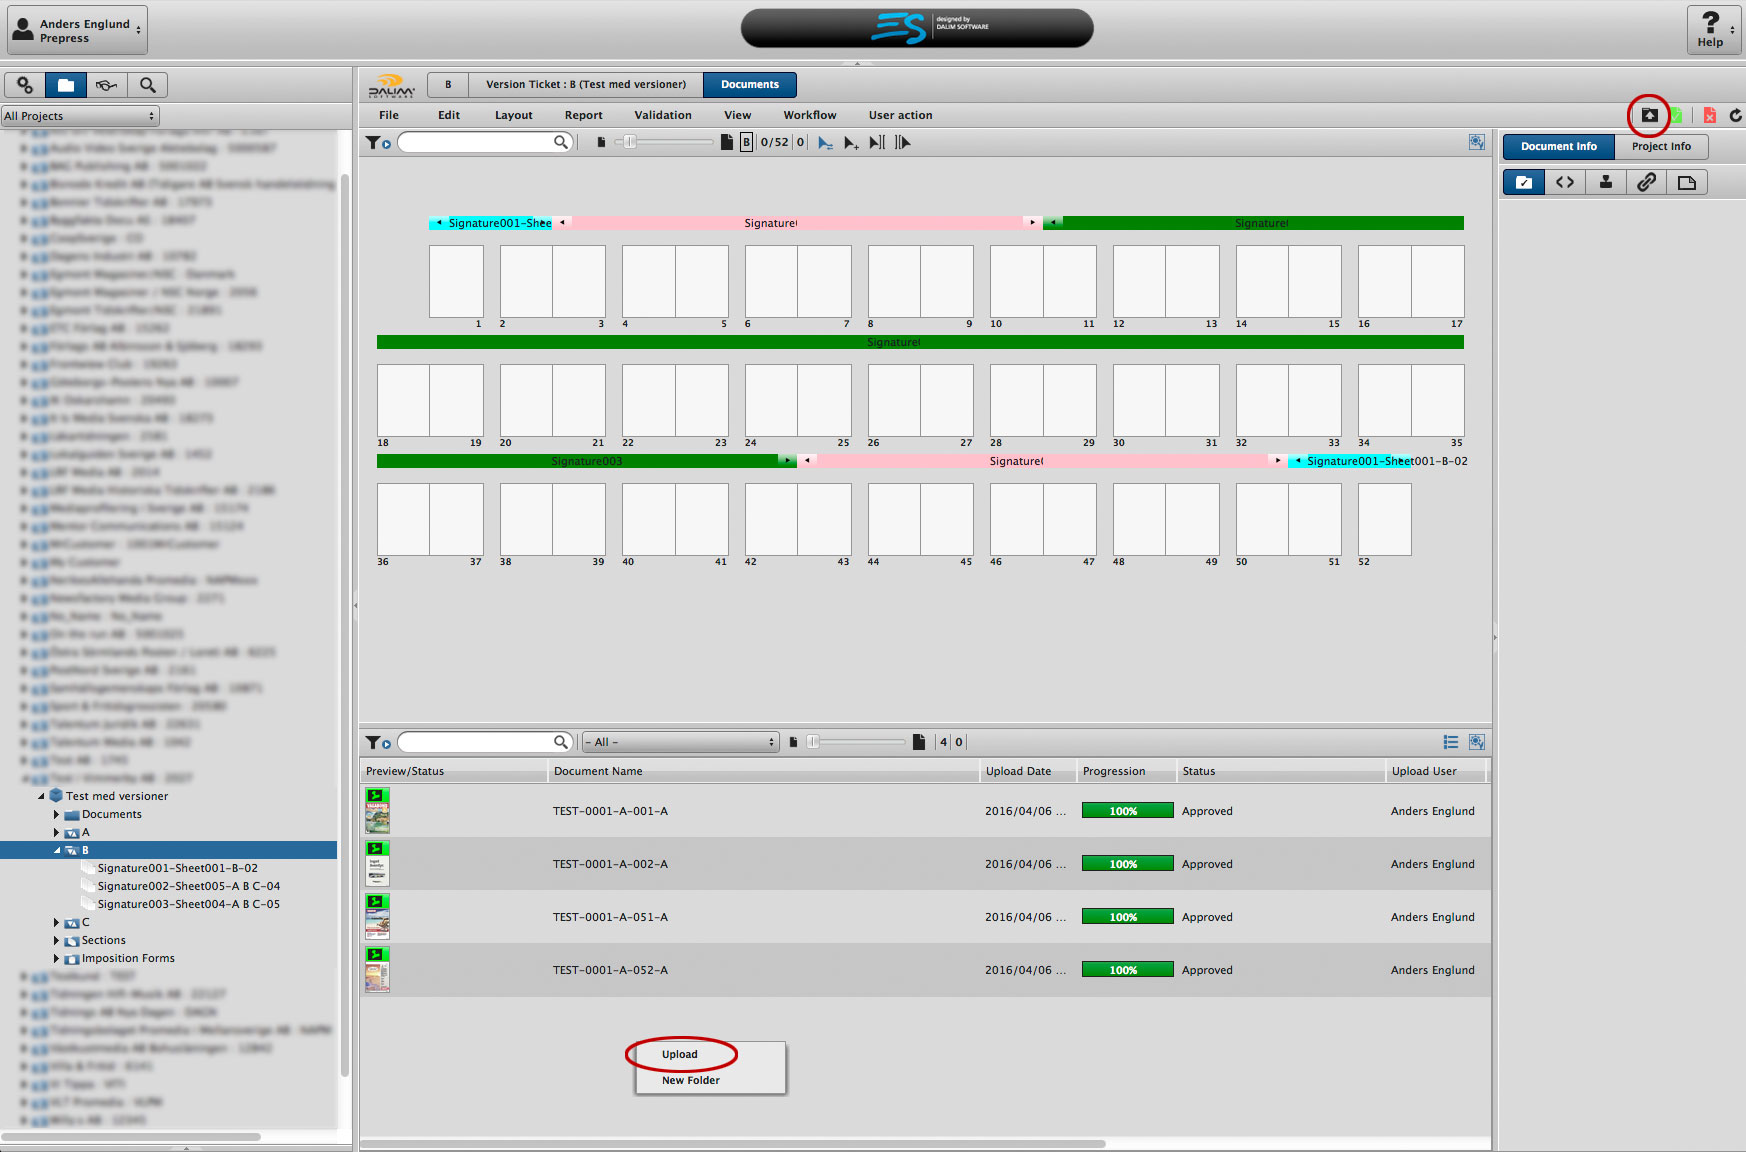
To upload in V-TAB Online, press cmd + y for mac or ctrl + y for windows or click
the icon at the top right. You can also right-click in the file list and select "Upload".
You can choose to drag files from your computer to the window or use the button "Add files to upload" to fill in the list of files to be uploaded. When you have added all the files for upload, then press the button "Start Uploads".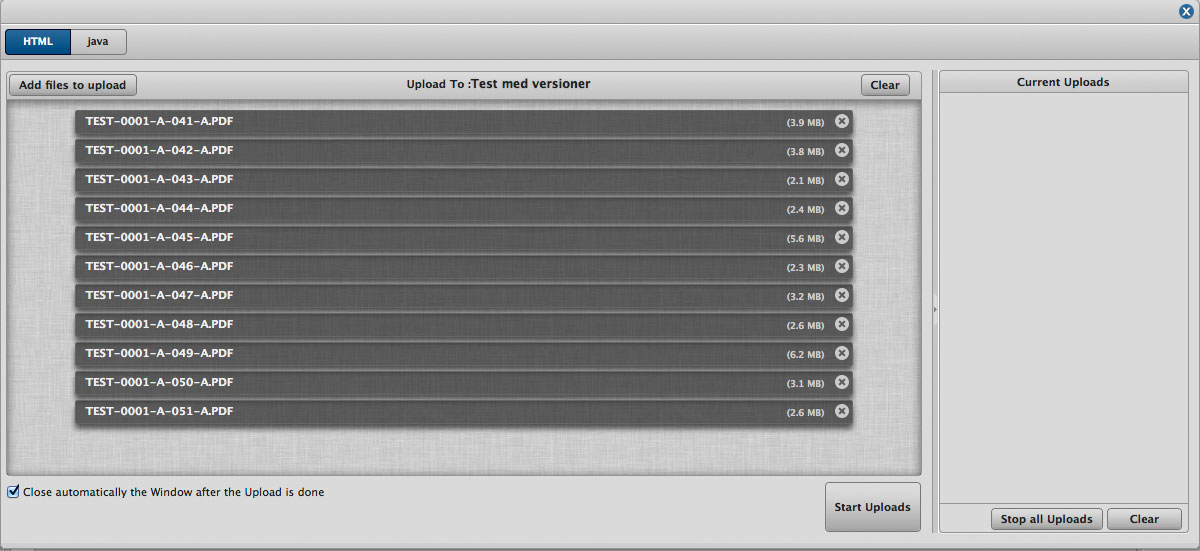
You can choose to drag files from your computer to the window or use the button "Add files to upload" to fill in the list of files to be uploaded. When you have added all the files for upload, then press the button "Start Uploads".
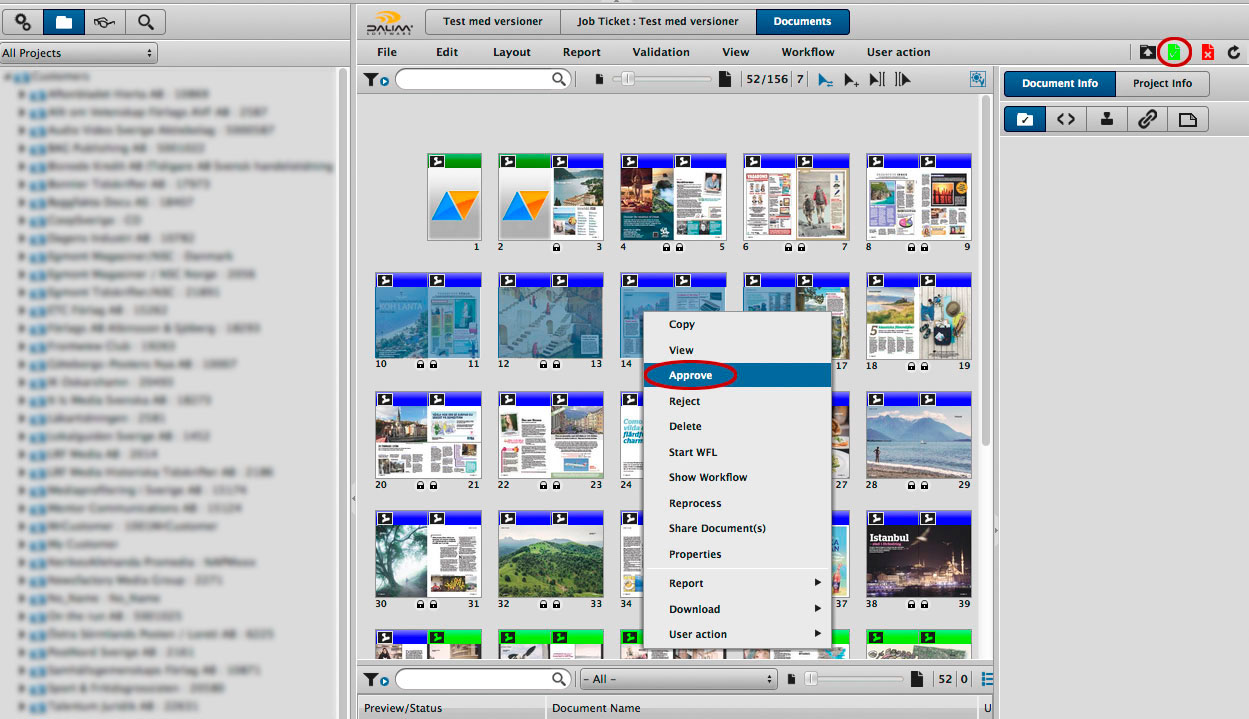
To approve pages in V-TAB Online, select the pages you want to approve in either
list view or in the flatplan. You can select pages in several different ways.
Just as you would select multiple files on your computer either by holding
cmd + a for mac or ctrl + a for windows, then all your files are selected and you can
then click the button for approval in V-TAB Online or right-click and select "Approve".
If you just want to approve some pages, hold cmd for mac or
ctrl for windows and click on the pages you want to select and then right-click on a
page and select "Approve" in the menu or use the button for approval in V-TAB Online. You can hold shift as well,
in the same way as you select files in your computer.
When you clicked "Approve" in the menu or clicked the button for approval, a dialog will appear, where you see which pages you have selected in the list to the right. Then click "OK" and your pages are approved.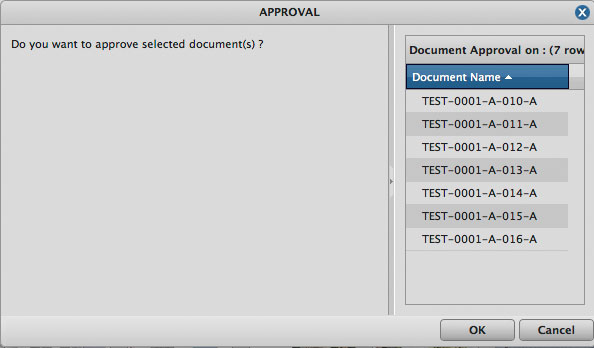
When you clicked "Approve" in the menu or clicked the button for approval, a dialog will appear, where you see which pages you have selected in the list to the right. Then click "OK" and your pages are approved.
All pages that have a red color above them have a preflight warning. To see what the warning is, select the pages with the red color bar
above the thumbnail. Then right-click on any of the pages and select "Report" and "Preflight HTML" or "Preflight PDF". You can also
access the PDF preflight from the HTML preflight by pressing the "PDF" button in the Preflight window.

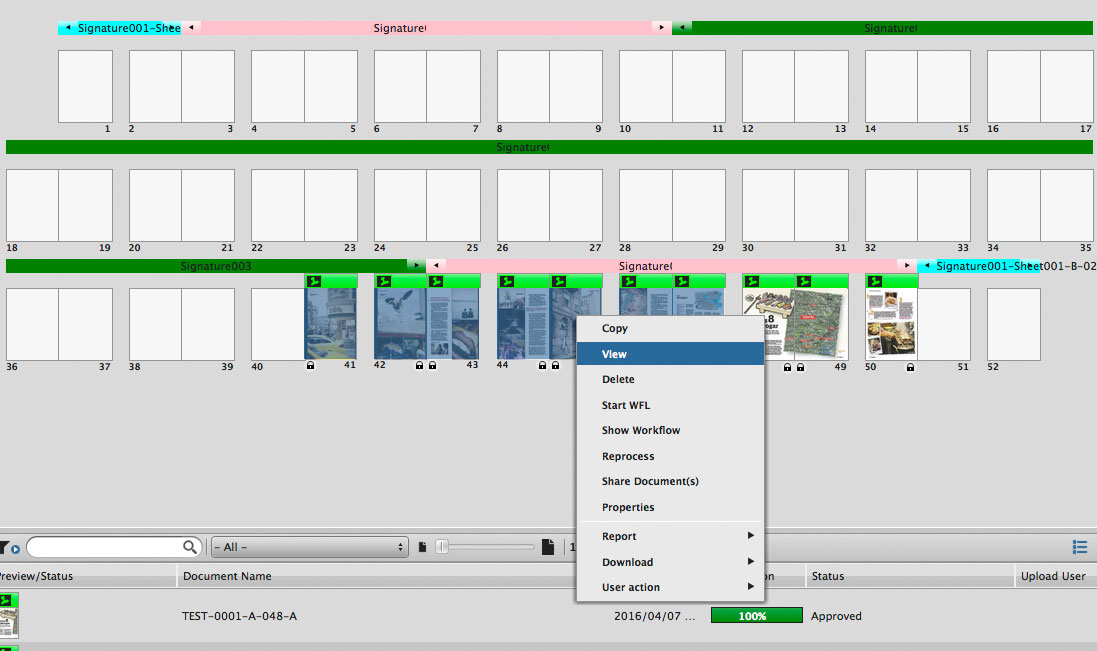
There are a few different ways to view your pages,
You can select your pages in V-TAB Online either in the list view or directly in the flatplan
just as you would select multiple files on your computer either by holding
cmd + a for mac or ctrl + a for windows, then all your files are selected and you can
then right-click on any page and select "view" in the menu.
If you just want to see some pages, hold cmd for mac or
ctrl for windows and click on the pages you want to select and then right-click on a
page and select "view" in the menu or double-click the mouse on one of the pages you selected. You can hold shift as well,
in the same way as you select files in your computer.
For those of you who have worked in Dialogue in old V-TAB Online MiSTRAL, you will certainly recognize the similarities. It is built on in principle the same as the JAVA version of Dialogue. Annotations, Measurement, Drawing and Writing notes is included. To approve the pages in Dialogue, there are two ways. Either by clicking the "Approve All" button at the top of the page list to approve all the pages that you have entered into Dialogue. You can also click the "Approve" button below the page window to approve only the page you are looking at.
View Options is a button where you can change how you see your pages in Dialogue. In the example, Double page cropped is selected.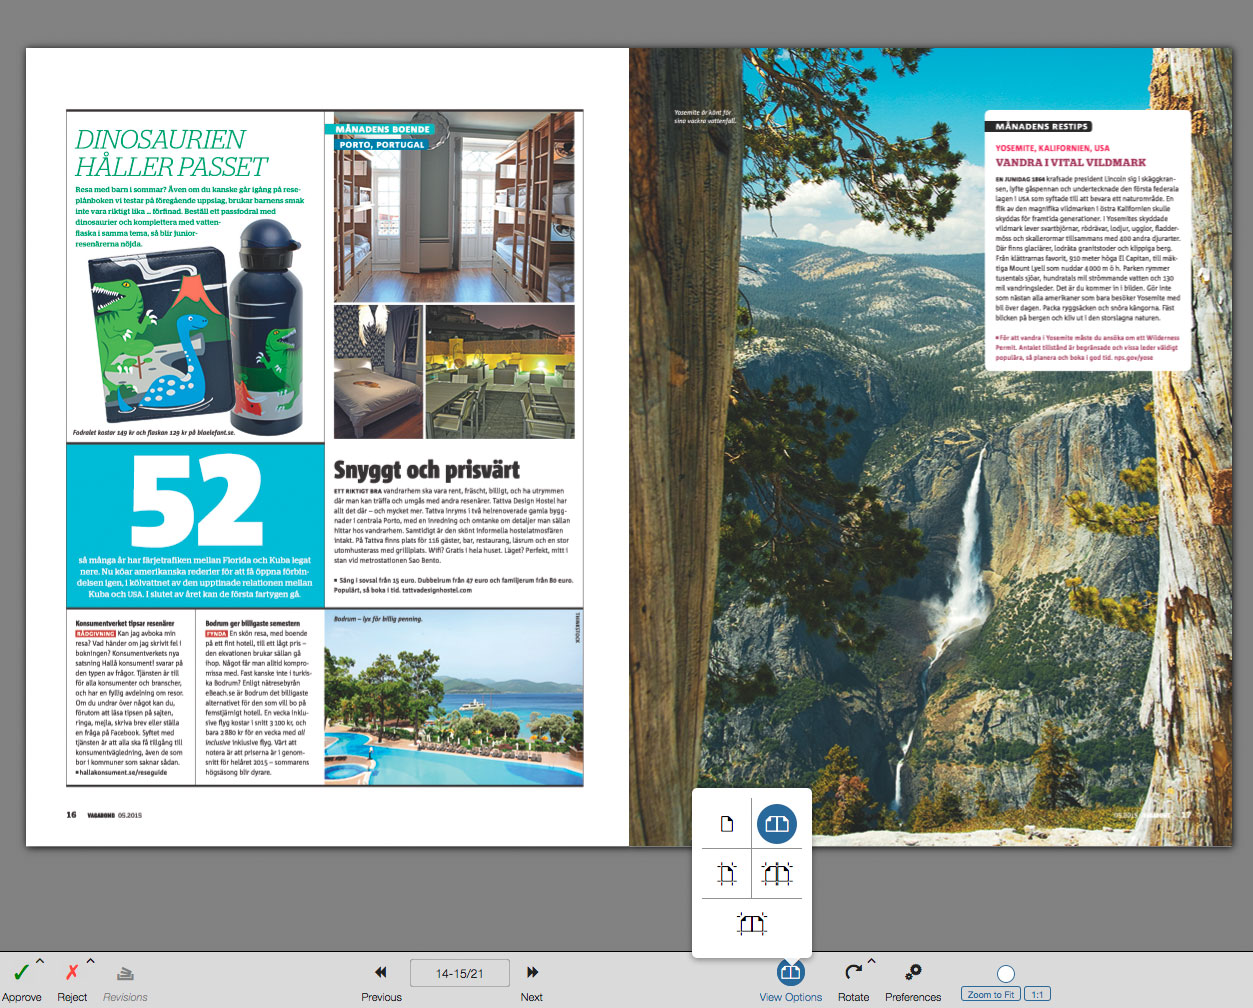
V-TAB Online has a tool called "Virtual Book" in that tool you can view your pages like in an e-magazine.
Virtual book can be found under the Menu View and Virtual Book.
You can either select several of the pages you want to watch and select "Virtual Book of the Selection". Or
choose "Virtual Book of the Project" to see all pages of your job.

In Virtual Book you can approve your pages, browse as a newspaper, write annotations and more. You can choose simulation mode, single or double page, get a movie strip under your pages to quickly take you to the page you want to see.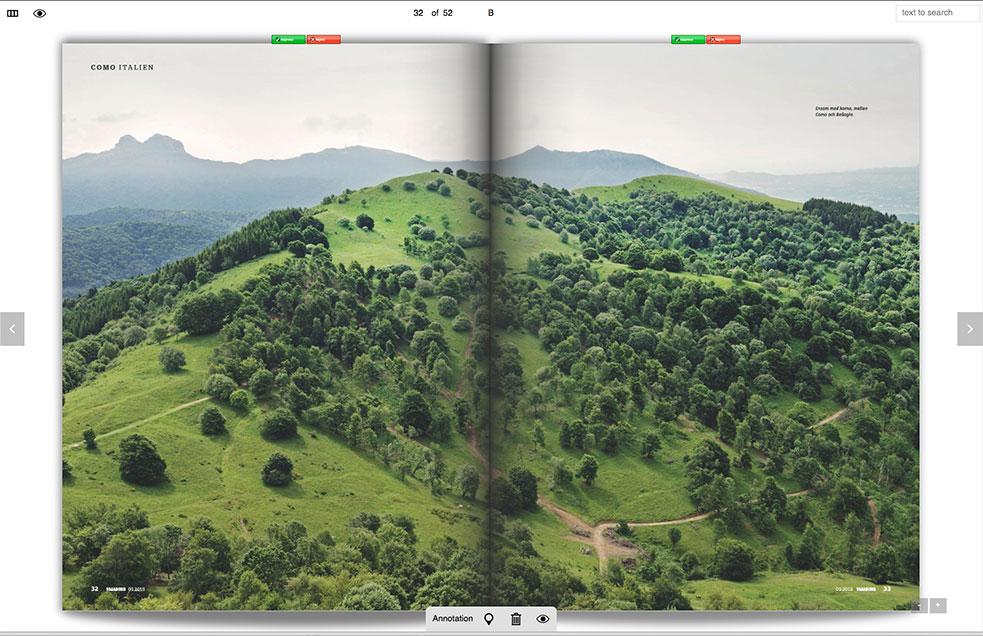
In Virtual Book you can approve your pages, browse as a newspaper, write annotations and more. You can choose simulation mode, single or double page, get a movie strip under your pages to quickly take you to the page you want to see.
In V-TAB Online, you can easily view a quick preview by selecting a page and pressing space .
a low resolution version of the page becomes visible, you cannot use it to check texts but you can browse through the page to see that everything is included.
You change page by pressing right arrow to go to the next page or left arrow to go to the previous page.

Download joboption and csf here
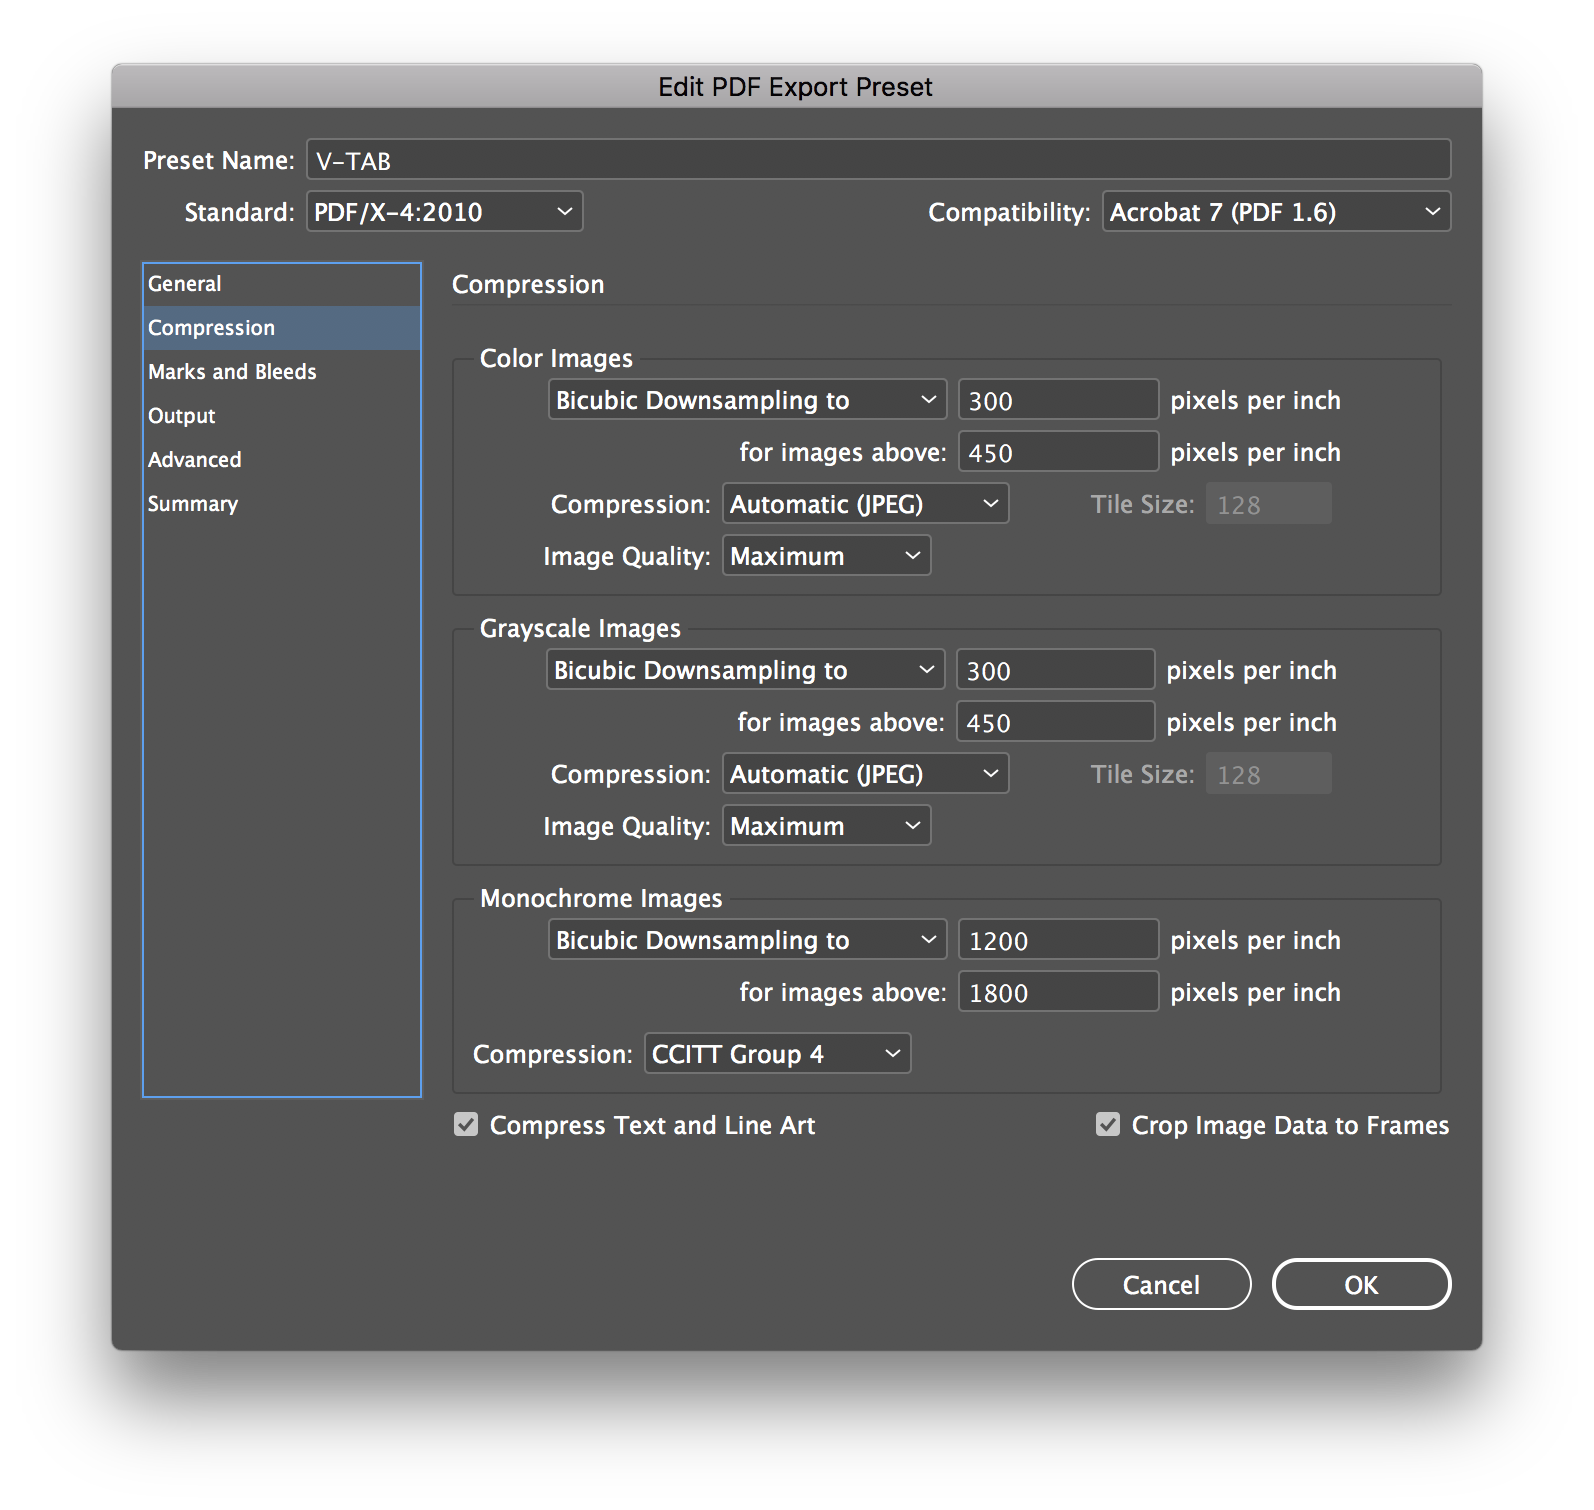
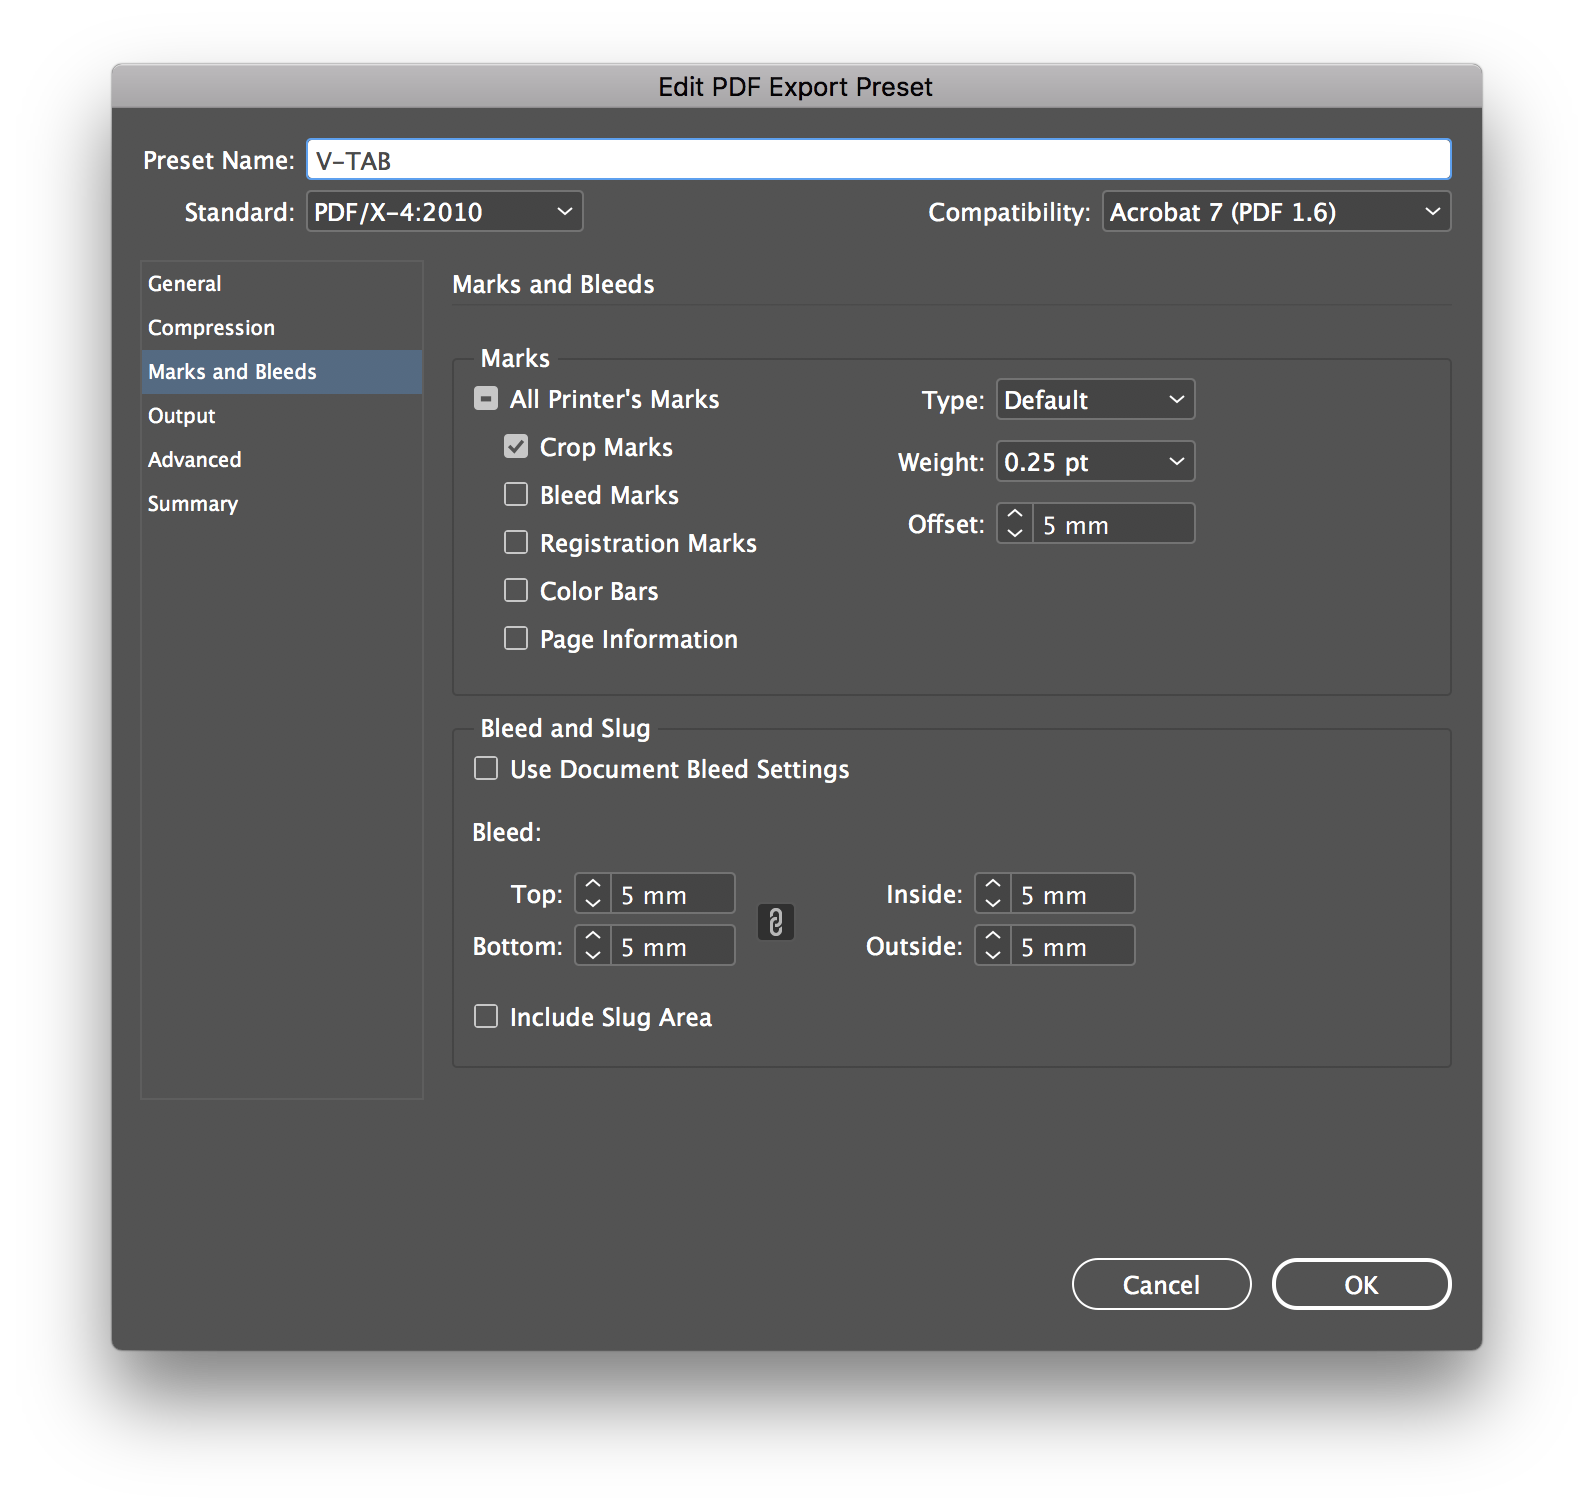
The PDF export uses the standard PDF / X4: 2010 where we made adjustments in marks and bleed. See the pictures below: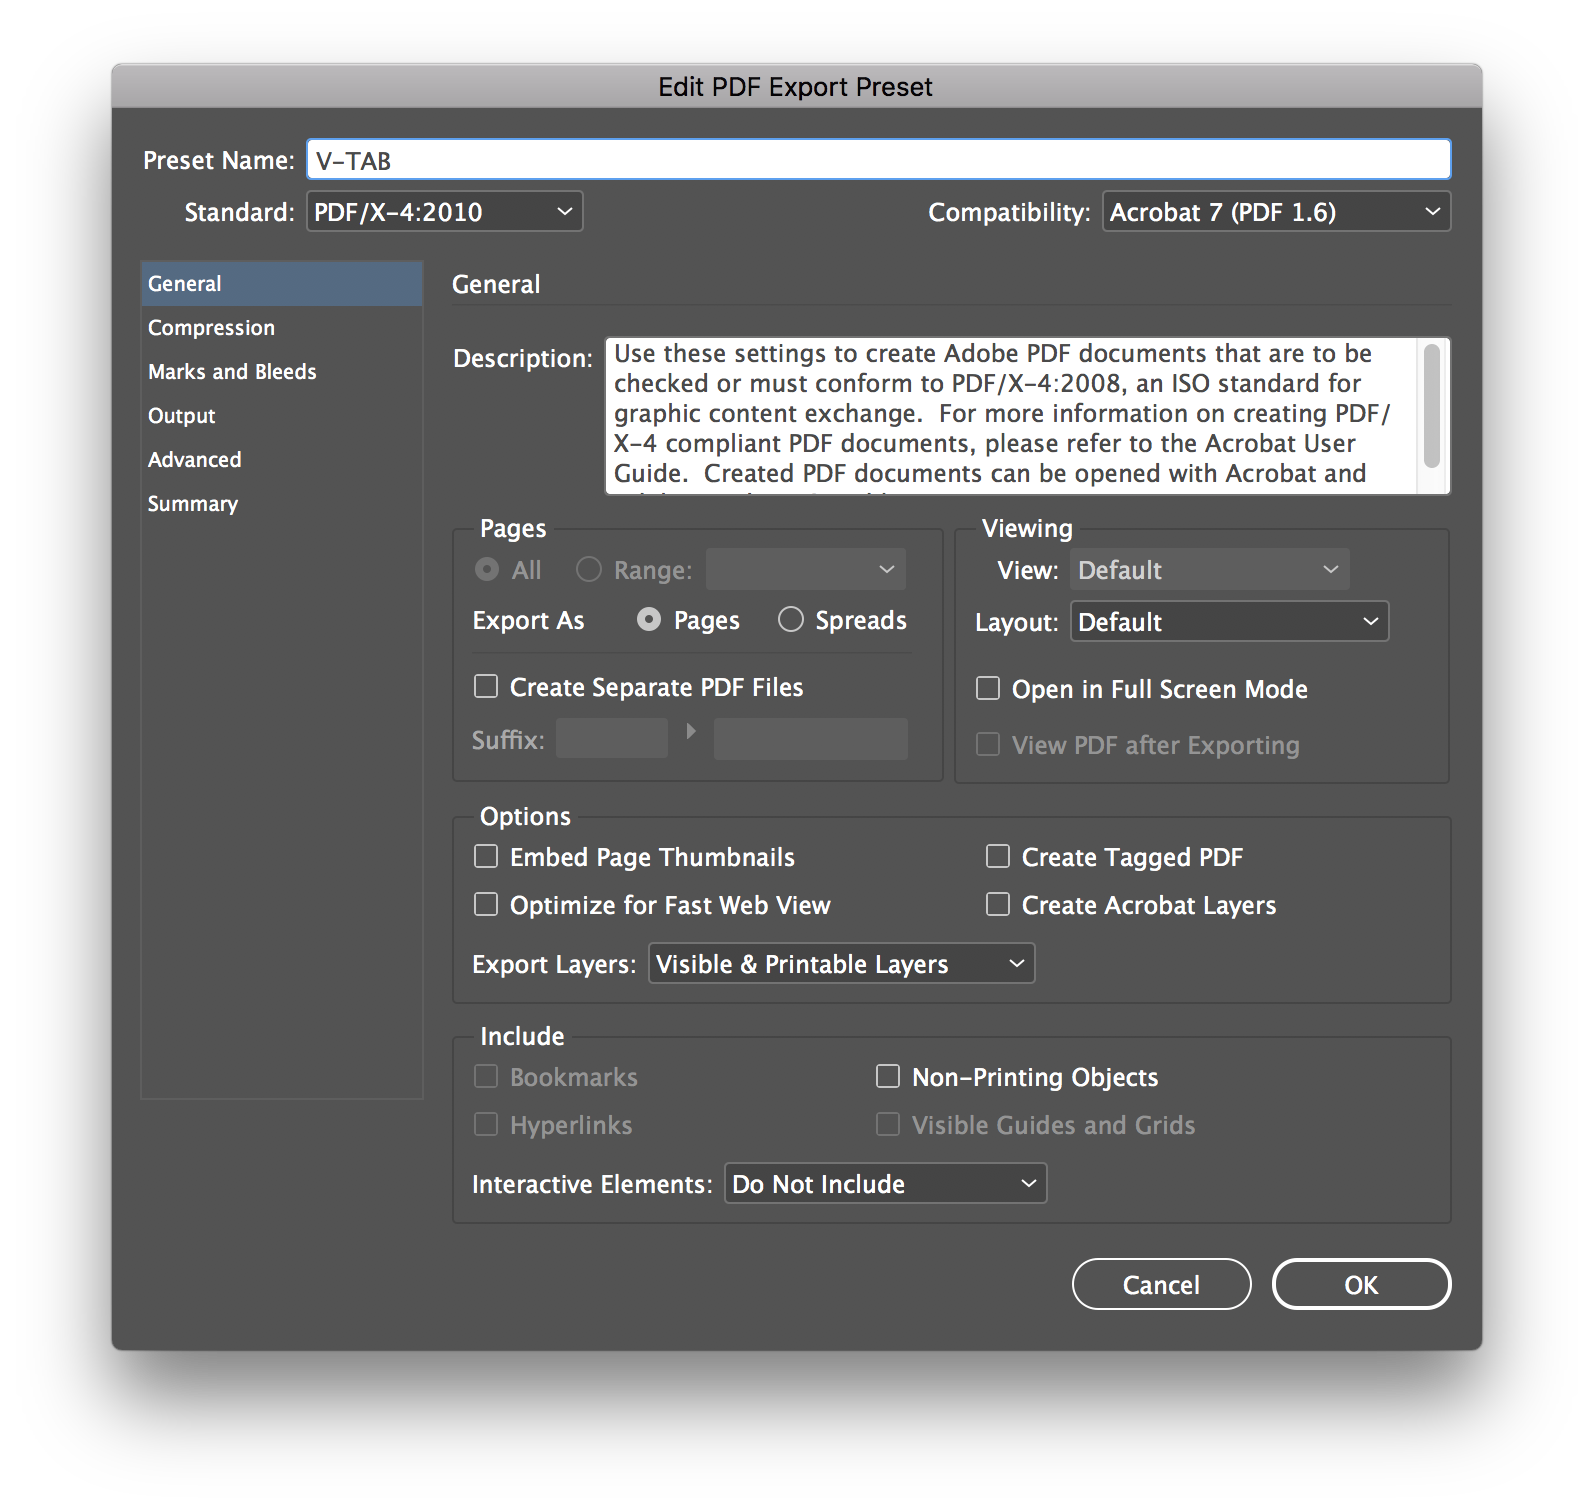
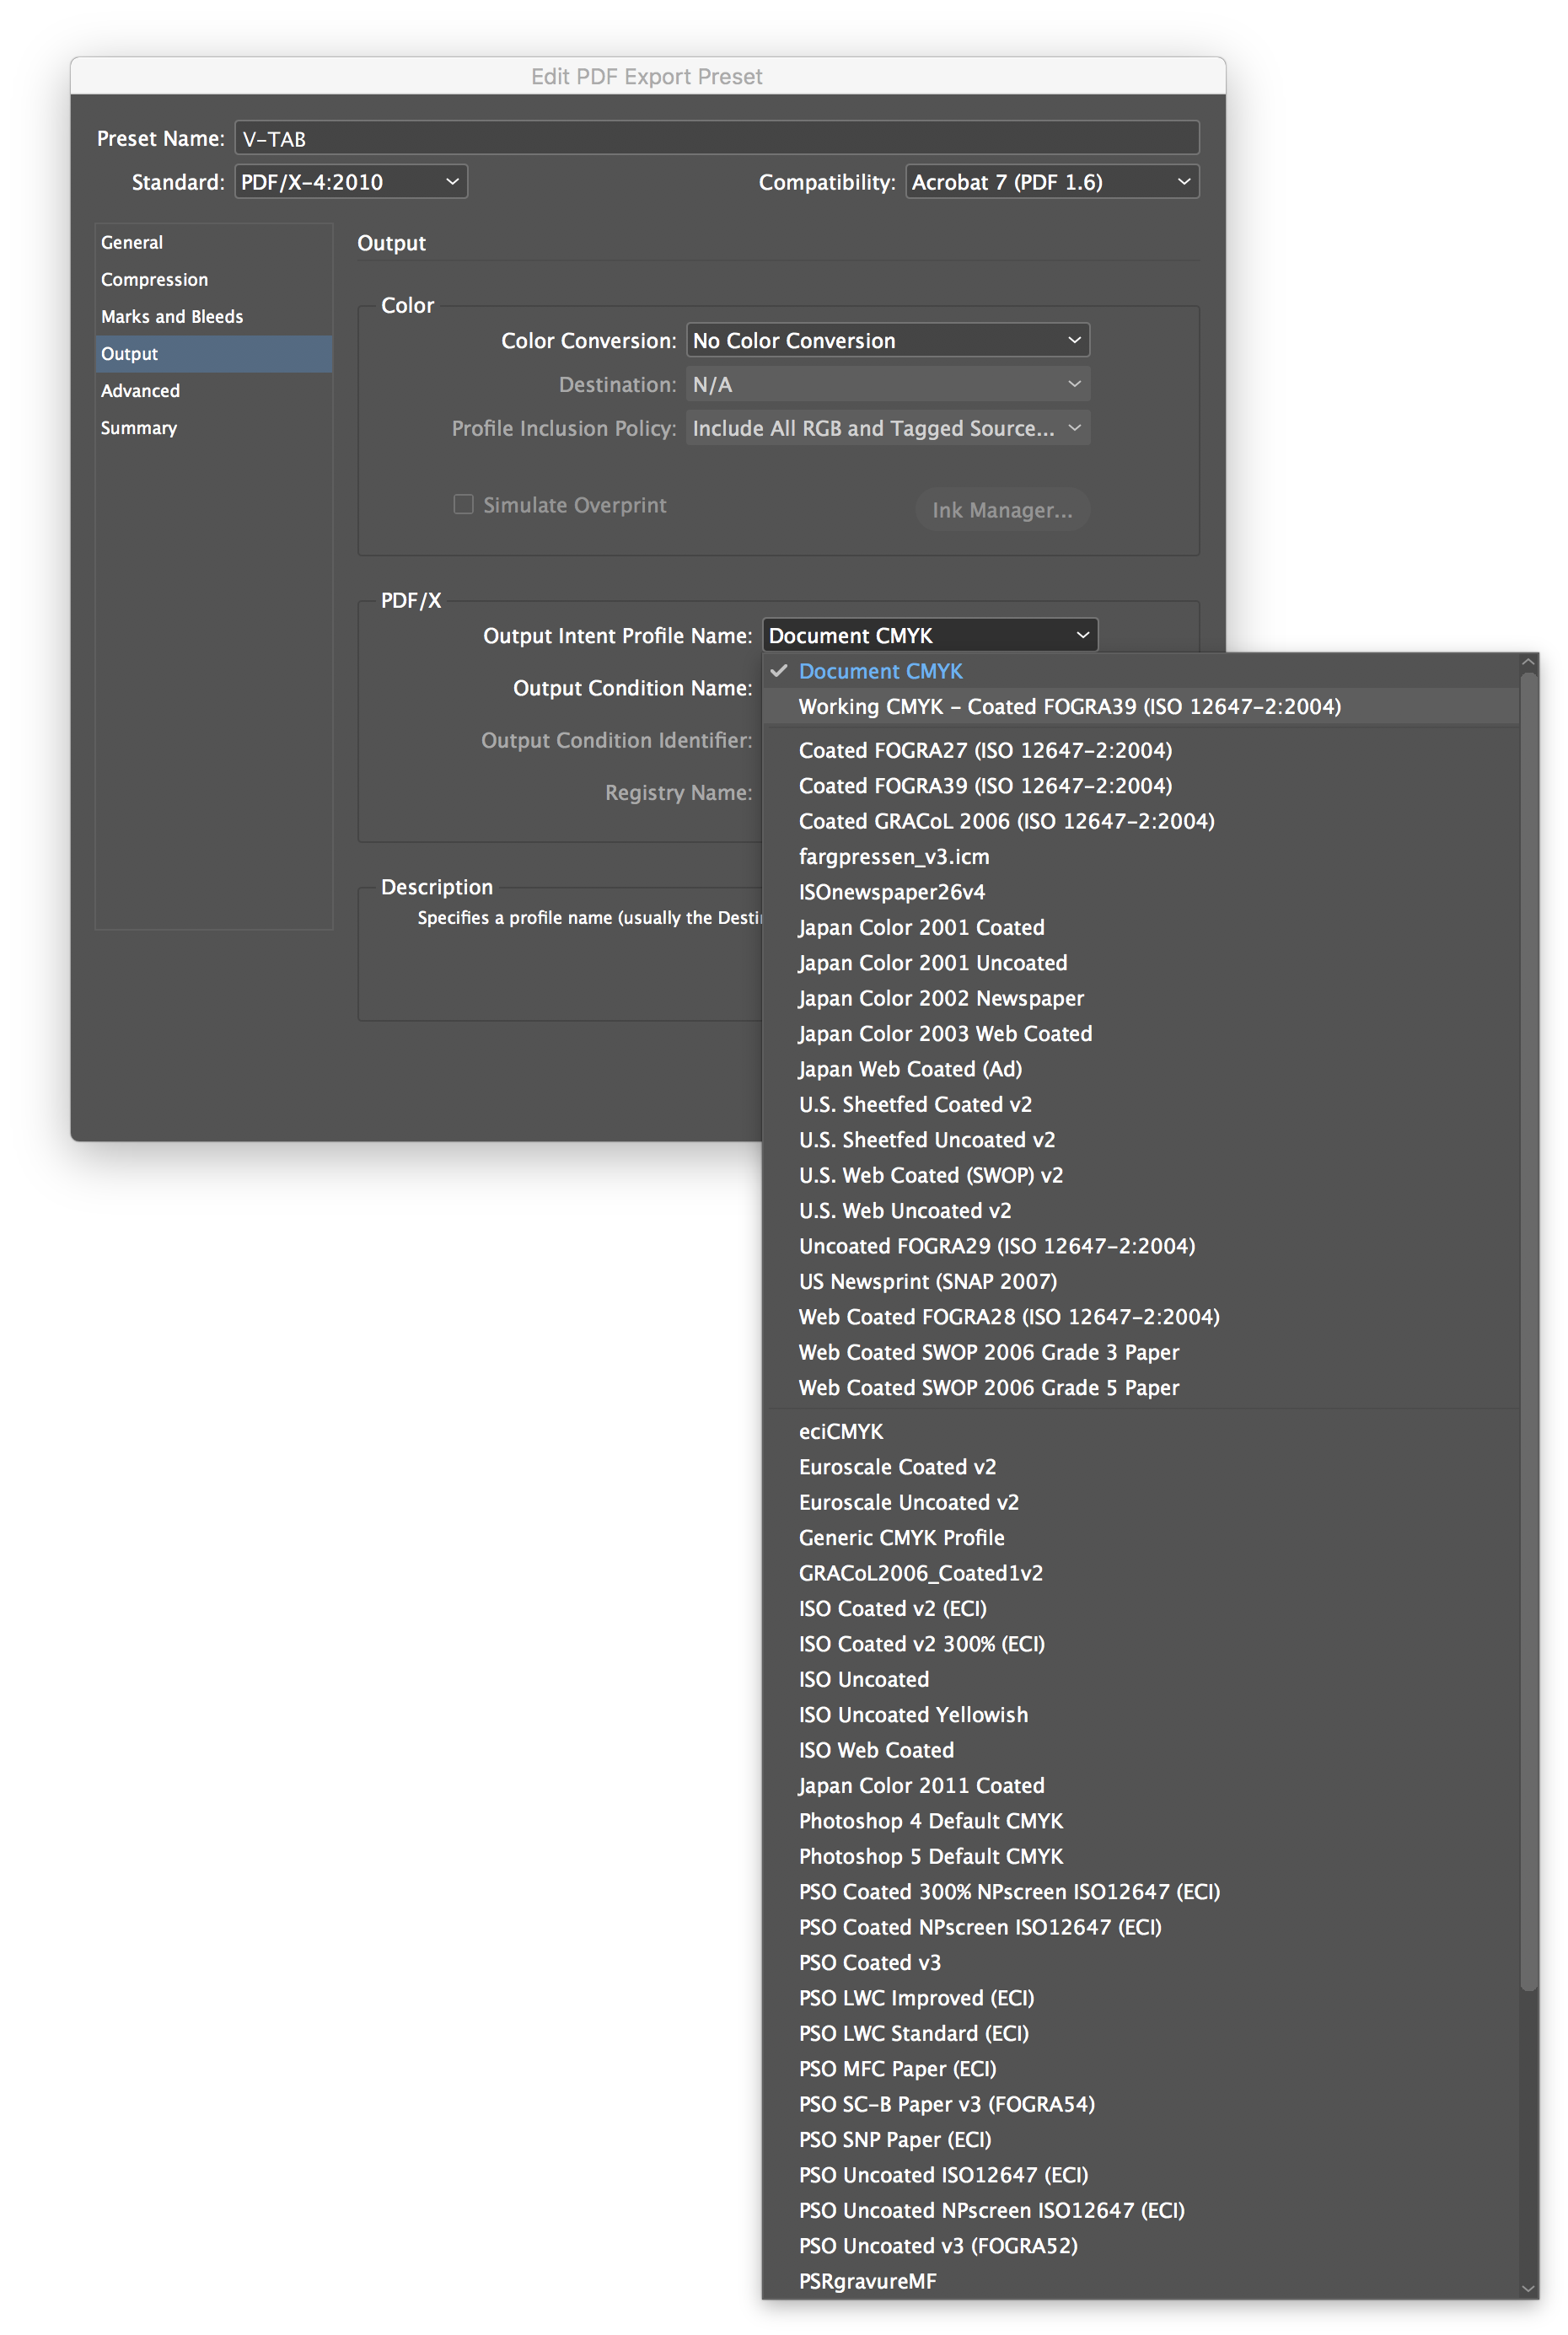
 Here you can see if your color settings are correct. The profile next to Working CMYK should be Coated FOGRA39 (ISO 12647-2: 2004) regardless of print paper.
The PDF export uses the standard PDF / X4: 2010 where we made adjustments in marks and bleed. See the pictures below:
Here you can see if your color settings are correct. The profile next to Working CMYK should be Coated FOGRA39 (ISO 12647-2: 2004) regardless of print paper.
Download joboption and csf here
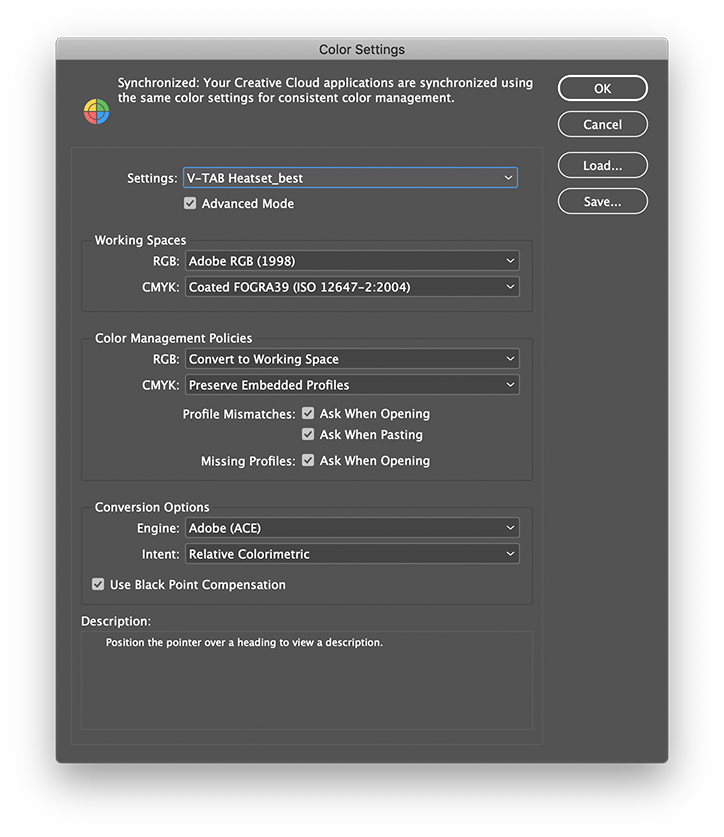
If you have downloaded our zip file containing the csf and joboption, unzip and place the csf file in the location described below. To create color settings, you need to make them in Indesign. Start by going to "Edit-> Color Settings" in Indesign. The setting should be equal to the picture below. When you are done press save and save the file in Adobe's default color settings folder.
For Mac /Users/Username/Library/Application Support/Adobe/Color/Settings
For Windows C:\Users\Username\AppData\Roaming\Adobe\Color\Settings
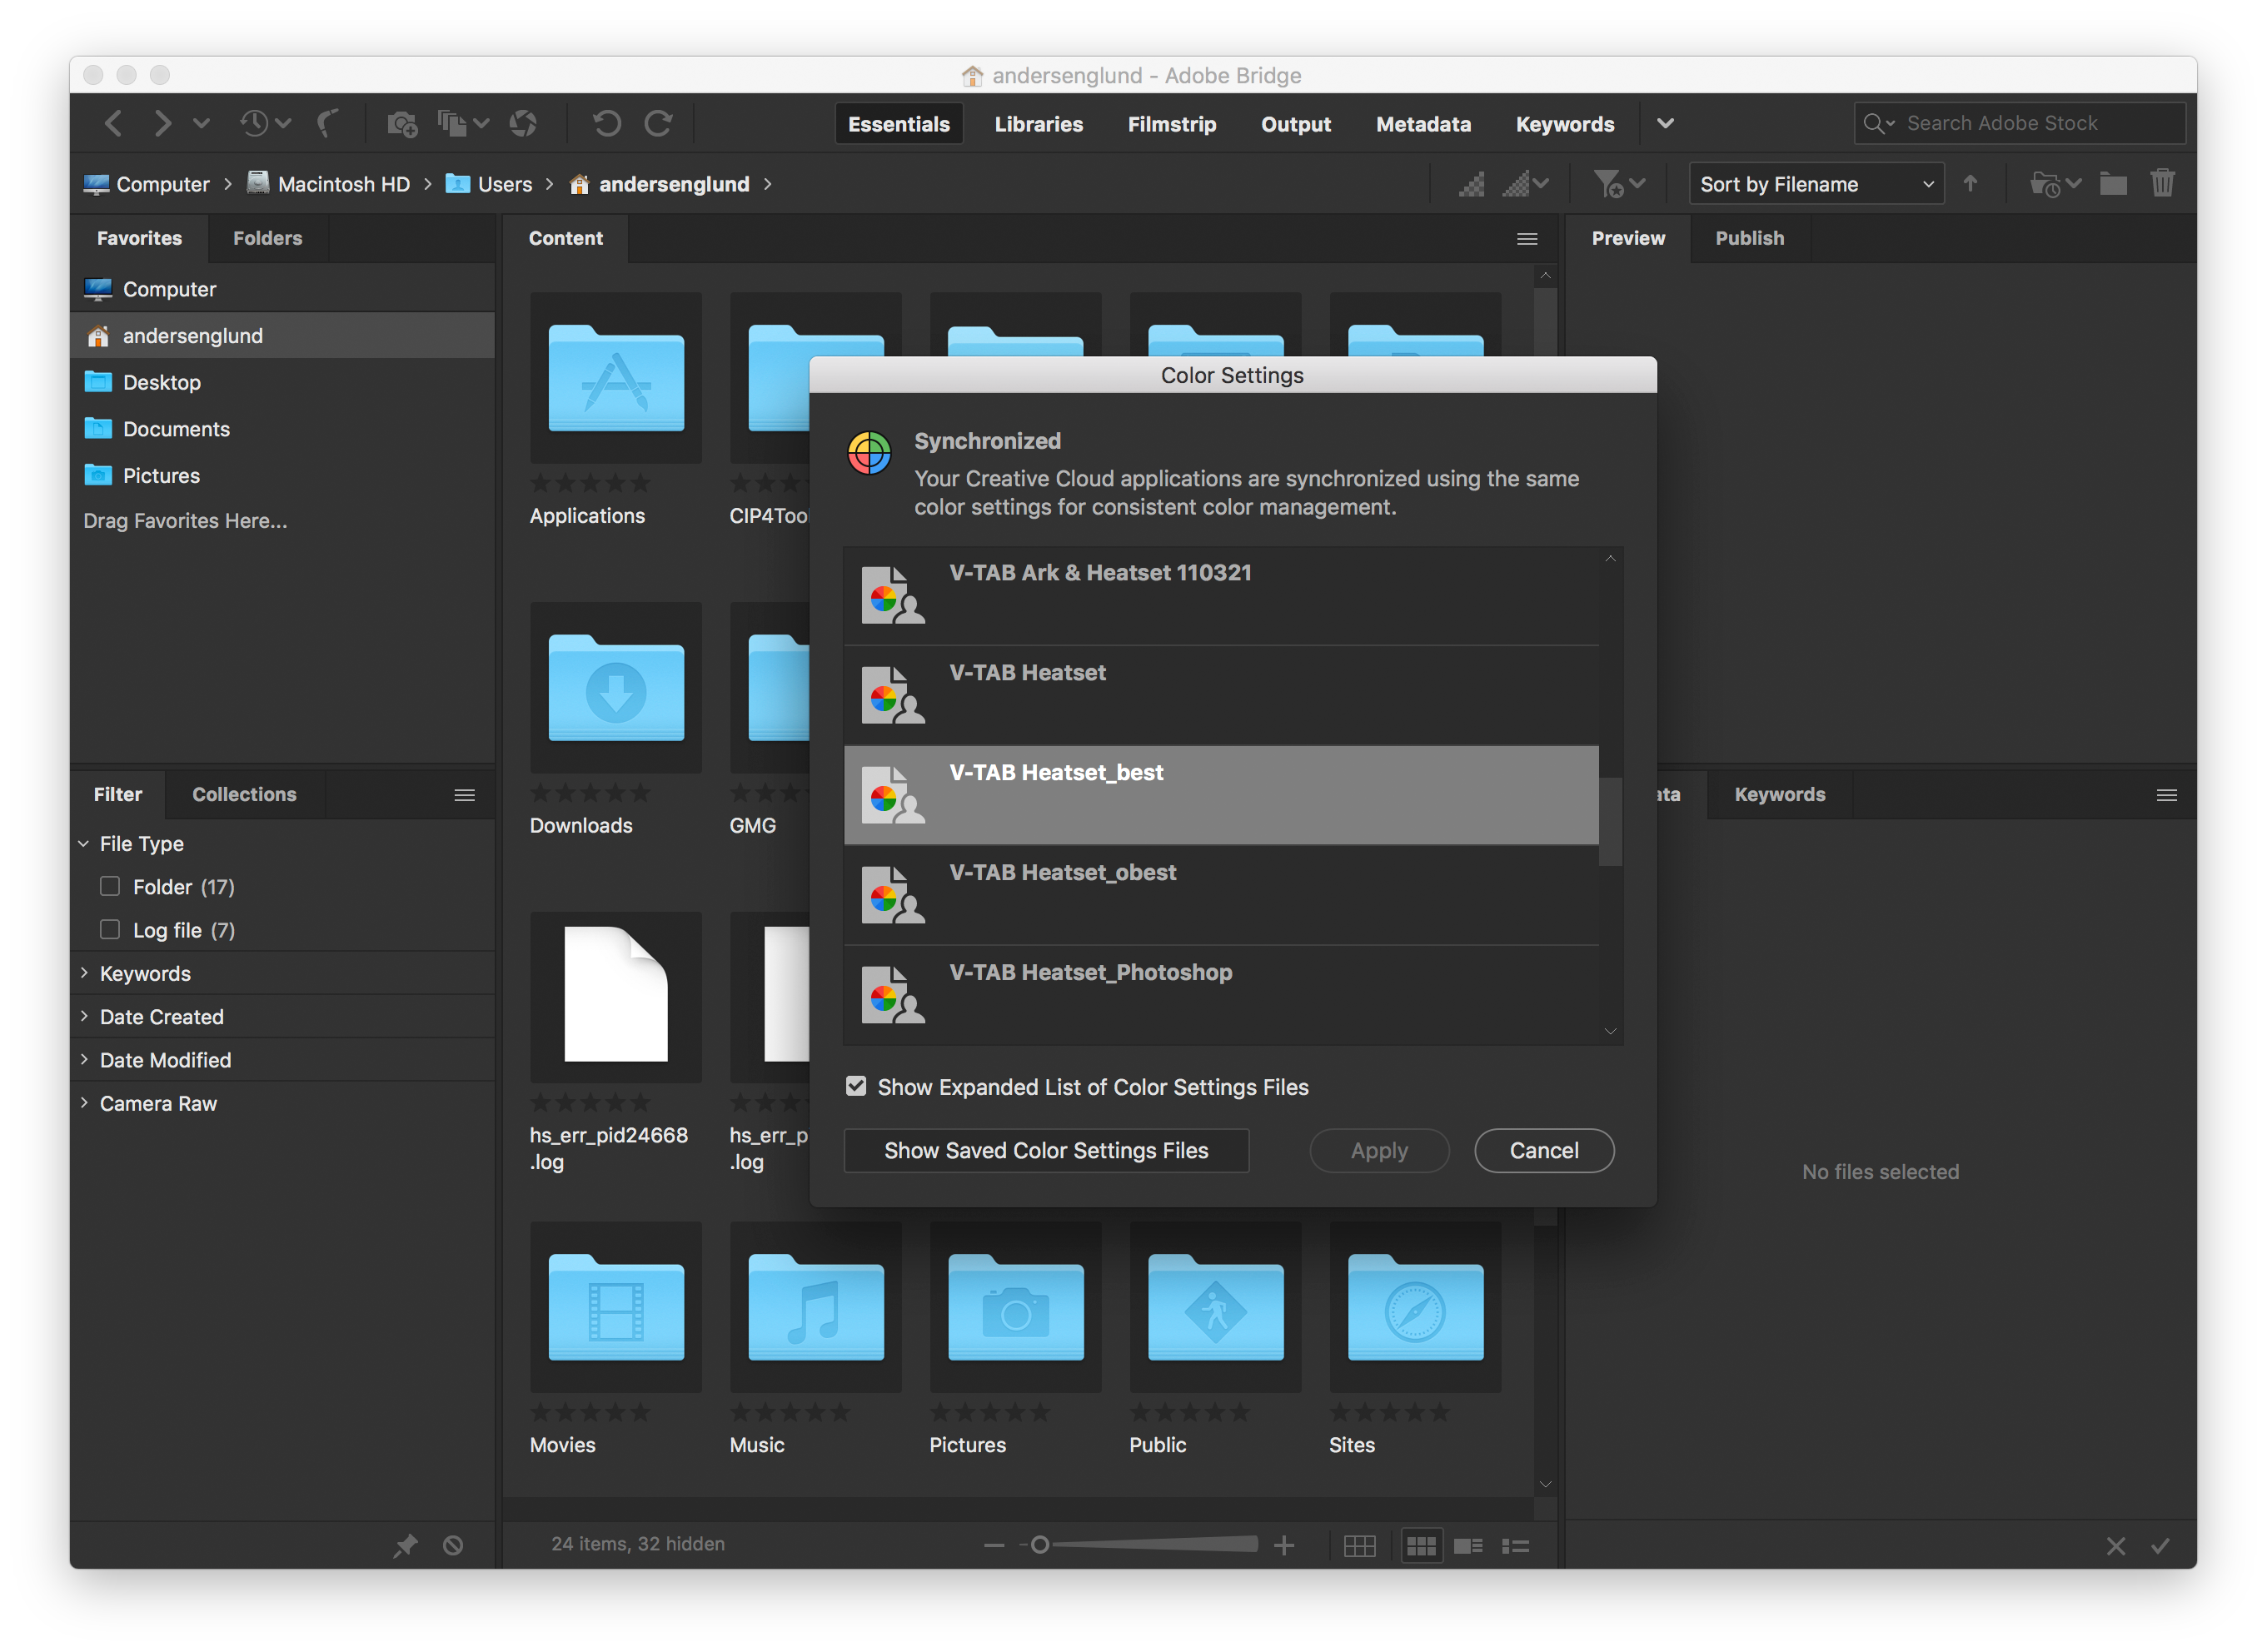
 Once you have saved your setting or placed the csf file in the correct location on your computer, open Adobe Bridge and go to "Edit-> Color Settings"
click the checkbox "Show Expanded List of Color Settings Files" and then select your saved profile and press Apply,
all your Adobe programs will be synced with the same color setting.
Once you have saved your setting or placed the csf file in the correct location on your computer, open Adobe Bridge and go to "Edit-> Color Settings"
click the checkbox "Show Expanded List of Color Settings Files" and then select your saved profile and press Apply,
all your Adobe programs will be synced with the same color setting.
If you have downloaded our zip file containing the csf and joboption, unzip and place the csf file in the location described below. To create color settings, you need to make them in Indesign. Start by going to "Edit-> Color Settings" in Indesign. The setting should be equal to the picture below. When you are done press save and save the file in Adobe's default color settings folder.
For Mac /Users/Username/Library/Application Support/Adobe/Color/Settings
For Windows C:\Users\Username\AppData\Roaming\Adobe\Color\Settings
Once you have saved your setting or placed the csf file in the correct location on your computer, open Adobe Bridge and go to "Edit-> Color Settings"
click the checkbox "Show Expanded List of Color Settings Files" and then select your saved profile and press Apply,
all your Adobe programs will be synced with the same color setting.